-
Table of Contents
- Step-by-Step Guide: Sharing Instagram Reels to Facebook
- Maximizing Reach: Tips for Sharing Instagram Reels on Facebook
- Cross-Promotion Made Easy: Sharing Instagram Reels to Facebook
- Engaging Your Audience: Strategies for Sharing Instagram Reels on Facebook
- Boosting Visibility: How to Share Instagram Reels Effectively on Facebook
- Q&A
“Seamlessly share your Instagram Reels on Facebook and captivate a wider audience.”
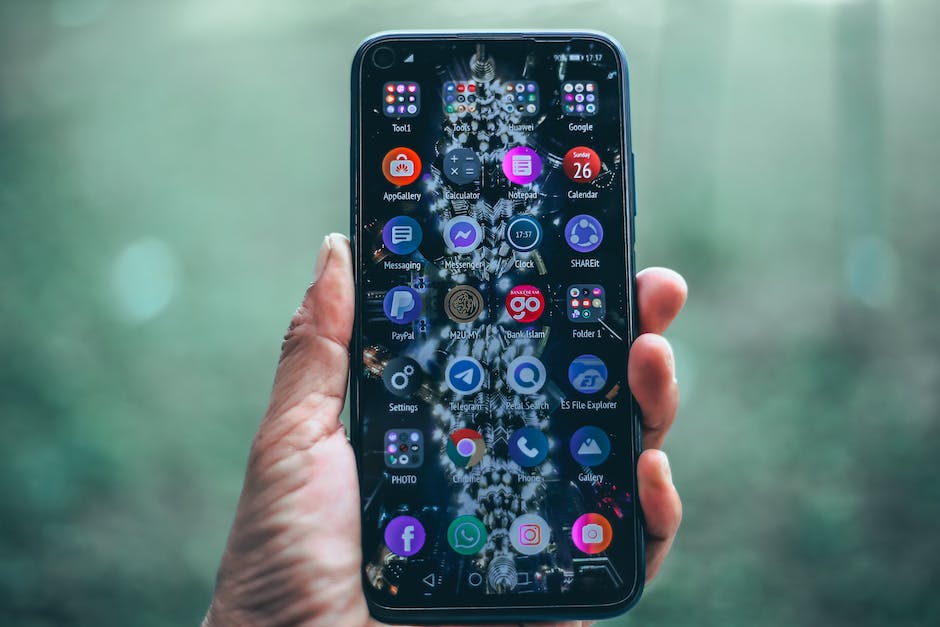
To share Instagram Reels to Facebook, follow these steps:
1. Open the Instagram app on your mobile device.
2. Navigate to the Reels tab by tapping on the camera icon at the top left corner of the screen.
3. Create or select the Reel you want to share.
4. Tap on the arrow icon at the bottom right corner of the screen.
5. On the Share screen, select the Facebook option.
6. If you haven’t already, you will be prompted to log in to your Facebook account.
7. Customize your post by adding a caption, location, or tagging friends if desired.
8. Choose the audience you want to share the Reel with (public, friends, or a specific group).
9. Tap on the Share button to post the Reel on your Facebook timeline.
That’s it! Your Instagram Reel will now be shared on your Facebook account for your friends and followers to see.
Step-by-Step Guide: Sharing Instagram Reels to Facebook
Instagram Reels have become a popular way for users to create and share short, entertaining videos. With their creative features and editing tools, Reels allow users to showcase their talents and engage with their followers. However, sometimes you may want to share your Reels on other platforms, such as Facebook, to reach a wider audience. In this step-by-step guide, we will walk you through the process of sharing your Instagram Reels to Facebook.
Step 1: Open the Instagram app on your mobile device and navigate to your profile page. To do this, tap on the profile icon located at the bottom right corner of the screen. Once you are on your profile page, locate the Reels tab, which is represented by a clapperboard icon.
Step 2: Select the Reel that you want to share on Facebook. Scroll through your Reels until you find the one you wish to share. Tap on the Reel to open it in full screen mode.
Step 3: Once the Reel is open, you will notice a series of icons at the bottom of the screen. Look for the three-dot menu icon and tap on it. This will open a menu with various options.
Step 4: From the menu, select the “Share” option. This will bring up a list of platforms where you can share your Reel. Look for the Facebook icon and tap on it.
Step 5: If you haven’t already connected your Facebook account to your Instagram, you will be prompted to do so. Follow the on-screen instructions to log in to your Facebook account and grant permission for Instagram to access your Facebook profile.
Step 6: After connecting your Facebook account, you will be presented with a screen where you can customize the settings for sharing your Reel. You can choose to share the Reel to your Facebook timeline, a specific Facebook page that you manage, or even to a Facebook group. Select the desired option and tap on “Share.”
Step 7: Instagram will then process your request and share the Reel to your selected Facebook destination. Depending on the length and size of the Reel, this process may take a few moments. Once the sharing is complete, you will receive a notification confirming the successful sharing of your Reel.
Step 8: To verify that your Reel has been successfully shared to Facebook, open the Facebook app on your mobile device or visit the Facebook website on your computer. Navigate to your timeline, the Facebook page, or the Facebook group where you chose to share the Reel. You should see the Reel displayed as a video post.
Congratulations! You have successfully shared your Instagram Reel to Facebook. By following these simple steps, you can expand your reach and engage with a wider audience on both platforms. Remember to keep creating and sharing captivating Reels to keep your followers entertained and interested in your content.
Maximizing Reach: Tips for Sharing Instagram Reels on Facebook
Instagram Reels have become a popular way for users to create and share short, entertaining videos. With their increasing popularity, it’s important to maximize the reach of your Reels by sharing them on other platforms, such as Facebook. In this article, we will discuss how to share Instagram Reels to Facebook, providing you with tips to ensure your content reaches a wider audience.
To begin, it’s important to note that Instagram and Facebook are owned by the same company, which means they have integrated features that allow for seamless sharing between the two platforms. This integration makes it easy for you to share your Reels on Facebook and reach a larger audience.
The first step in sharing your Instagram Reels on Facebook is to create the Reel itself. Make sure to create engaging and high-quality content that will capture the attention of your audience. Once you have created your Reel, you can proceed to share it on Facebook.
To share your Reel on Facebook, open the Instagram app on your mobile device and navigate to the Reel you want to share. Tap on the three dots (…) at the bottom right corner of the Reel and select the “Share” option. From the sharing options, choose “Facebook” and customize the privacy settings if desired. Finally, tap on “Share” to post your Reel on Facebook.
By sharing your Reels on Facebook, you can reach a wider audience and increase your chances of gaining more followers and engagement. However, it’s important to keep in mind that the algorithms of both platforms work differently, so there are a few additional tips to consider when sharing your Reels on Facebook.
Firstly, consider the timing of your posts. Facebook’s algorithm prioritizes recent content, so it’s important to share your Reels when your audience is most active. Analyze your Facebook Insights to determine the optimal posting times for your target audience.
Secondly, make use of captions and hashtags. While Instagram Reels allow you to add captions and hashtags directly within the video, Facebook relies on the text accompanying the post. Craft a compelling caption that describes your Reel and includes relevant hashtags to increase its discoverability on Facebook.
Additionally, engage with your audience on both platforms. When you share your Reels on Facebook, make sure to respond to comments and interact with your audience. This not only helps build a community but also signals to Facebook’s algorithm that your content is valuable and worth promoting.
Lastly, consider cross-promotion. Leverage your existing Facebook audience by promoting your Instagram Reels on your Facebook page or profile. This can be done by sharing a teaser or a snippet of your Reel on Facebook, along with a call-to-action to watch the full video on Instagram. This cross-promotion can help drive traffic to your Instagram account and increase your overall reach.
In conclusion, sharing your Instagram Reels on Facebook is a great way to maximize your content’s reach and engage with a wider audience. By following the steps outlined in this article and considering additional tips such as timing, captions, engagement, and cross-promotion, you can effectively share your Reels on Facebook and increase your chances of gaining more followers and engagement. So, start sharing your Reels on Facebook today and watch your content reach new heights!
Cross-Promotion Made Easy: Sharing Instagram Reels to Facebook
Instagram Reels have become a popular way for users to create and share short, entertaining videos. With their catchy music, creative effects, and easy-to-use editing tools, Reels have quickly gained a dedicated following. However, if you want to reach an even wider audience, you may want to consider cross-promoting your Reels on Facebook. In this article, we will guide you through the process of sharing your Instagram Reels to Facebook, making cross-promotion a breeze.
To begin, open the Instagram app on your mobile device and navigate to your profile page. From there, tap on the Reels icon located at the bottom of the screen. This will take you to the Reels creation page, where you can either choose to create a new Reel or select an existing one from your gallery.
Once you have selected the Reel you want to share, tap on the three dots located at the bottom right corner of the screen. This will open a menu of options. From the menu, select the “Share” option. A new screen will appear, displaying various platforms where you can share your Reel. Look for the Facebook icon and tap on it.
If you haven’t already connected your Instagram and Facebook accounts, you will be prompted to do so. Follow the on-screen instructions to link your accounts. Once your accounts are connected, you will be able to share your Reel directly to your Facebook profile or page.
Before sharing, you have the option to customize the caption and privacy settings for your Reel. You can add a catchy caption that will grab the attention of your Facebook audience and make them want to watch your Reel. Additionally, you can choose whether you want your Reel to be visible to the public or only to your friends and followers.
Once you have finalized your caption and privacy settings, tap on the “Share” button. Instagram will then upload your Reel to Facebook, and a confirmation message will appear once the process is complete. You can now navigate to your Facebook profile or page to see your shared Reel.
It’s important to note that sharing your Instagram Reels to Facebook does not automatically sync the two platforms. This means that any changes you make to your Reel on Instagram, such as editing or deleting it, will not be reflected on Facebook. If you want to make changes to your shared Reel, you will need to do so separately on each platform.
Cross-promoting your Instagram Reels on Facebook can be a powerful tool for expanding your audience and increasing engagement. By leveraging the reach of both platforms, you can attract new followers and drive traffic to your content. Additionally, sharing your Reels on Facebook allows you to tap into the different demographics and user bases of each platform, maximizing your visibility and potential impact.
In conclusion, sharing your Instagram Reels to Facebook is a simple and effective way to cross-promote your content. By following the steps outlined in this article, you can easily share your Reels with your Facebook audience, expanding your reach and increasing engagement. So why not give it a try and see the positive impact it can have on your social media presence?
Engaging Your Audience: Strategies for Sharing Instagram Reels on Facebook
Instagram Reels have become a popular way for users to create and share short, entertaining videos. With their catchy music, creative effects, and easy-to-use editing tools, Reels have quickly gained traction among Instagram users. However, if you want to reach a wider audience and engage with your followers on other platforms, sharing your Reels on Facebook is a great strategy to consider. In this article, we will explore how to share Instagram Reels to Facebook and discuss some effective strategies for engaging your audience.
To begin, let’s look at the process of sharing your Reels on Facebook. The first step is to open the Instagram app on your mobile device and navigate to the Reels tab. Once you have selected the Reel you want to share, tap on the three dots at the bottom right corner of the screen. This will open a menu of options, and you should choose the “Share” option. From there, you will see a list of platforms where you can share your Reel, including Facebook. Simply select Facebook, add a caption if desired, and tap on the “Share” button. Your Reel will then be posted on your Facebook profile for your friends and followers to see.
Sharing your Reels on Facebook can be a powerful way to engage your audience and increase your reach. By leveraging the different features and functionalities of both platforms, you can create a seamless experience for your followers. One effective strategy is to use Facebook’s tagging feature to mention any relevant pages or individuals in your Reels. This not only increases the visibility of your content but also encourages engagement and collaboration with other users.
Another strategy is to leverage Facebook’s sharing options to cross-promote your Reels. When you share your Reel on Facebook, you can choose to make it public or limit its visibility to specific groups or individuals. By strategically selecting your audience, you can target specific segments and tailor your content accordingly. For example, if you have a Reel that is particularly relevant to a certain group of followers, you can choose to share it with them exclusively. This personalized approach can help you build stronger connections with your audience and increase engagement.
Additionally, you can use Facebook’s analytics tools to track the performance of your shared Reels. By monitoring metrics such as reach, engagement, and shares, you can gain valuable insights into what resonates with your audience. This data can then be used to refine your content strategy and create more impactful Reels in the future.
In conclusion, sharing your Instagram Reels on Facebook is a powerful strategy for engaging your audience and increasing your reach. By following a few simple steps, you can seamlessly share your Reels on Facebook and leverage the platform’s features to enhance your content. By using tagging, cross-promotion, and analytics, you can create a more personalized and engaging experience for your followers. So, why not give it a try and start sharing your Reels on Facebook today? Your audience will thank you for it.
Boosting Visibility: How to Share Instagram Reels Effectively on Facebook
Instagram Reels have become a popular way for users to create and share short, engaging videos. With their increasing popularity, it’s important to maximize the visibility of your Reels by sharing them effectively on other platforms, such as Facebook. In this article, we will guide you through the process of sharing Instagram Reels to Facebook, helping you boost your visibility and reach a wider audience.
To begin, open the Instagram app on your mobile device and navigate to the Reels tab. Here, you can browse through your own Reels or explore the Reels of others. Once you have selected the Reel you want to share, tap on the three dots at the bottom right corner of the screen. This will open a menu of options, including the option to share the Reel.
When you tap on the share option, a list of platforms will appear. Select Facebook from the list, and you will be prompted to log in to your Facebook account if you haven’t already done so. Once logged in, you will have the option to customize the privacy settings for your shared Reel. You can choose to share it publicly, with your friends, or with a specific group of people.
After selecting your desired privacy settings, you can add a caption to your Reel. This is an important step as it allows you to provide context and engage your audience. Consider using relevant hashtags to increase the discoverability of your Reel on Facebook. Additionally, you can tag friends or pages in your caption to further expand your reach.
Once you have added a caption and any desired tags, you can proceed to share your Reel on Facebook. Tap on the “Share” button, and your Reel will be posted to your Facebook timeline. Depending on your privacy settings, it may also appear in the news feeds of your friends or followers.
Sharing your Instagram Reels on Facebook not only increases their visibility but also allows you to leverage the different features and functionalities of both platforms. For example, Facebook offers the option to boost your Reel as an advertisement, reaching an even wider audience. This can be particularly useful if you are using Reels to promote a product or service.
Furthermore, sharing your Reels on Facebook allows you to tap into the existing community and network you have built on the platform. Your Facebook friends and followers may not be aware of your Instagram presence, and sharing Reels on Facebook can help bridge that gap and drive traffic to your Instagram profile.
In conclusion, sharing Instagram Reels on Facebook is a powerful strategy to boost visibility and reach a wider audience. By following the simple steps outlined in this article, you can effectively share your Reels on Facebook, customize privacy settings, add captions and tags, and leverage the features of both platforms. So, don’t miss out on the opportunity to maximize the impact of your Reels by sharing them on Facebook. Start sharing today and watch your visibility soar!
Q&A
1. How can I share an Instagram Reel to Facebook?
You can share an Instagram Reel to Facebook by tapping on the “Share” button below the Reel and selecting the Facebook option.
2. Can I share my Instagram Reel directly to my Facebook page?
Yes, you can share your Instagram Reel directly to your Facebook page by selecting the page you want to share it to in the Facebook sharing options.
3. Is it possible to share someone else’s Instagram Reel to Facebook?
No, you can only share your own Instagram Reels to Facebook. You cannot directly share someone else’s Reel to your Facebook account.
4. Are there any privacy settings to consider when sharing Instagram Reels to Facebook?
Yes, you can choose the privacy settings for your Instagram Reels before sharing them to Facebook. You can select to share them publicly, with friends, or with a custom audience.
5. Can I edit the caption or add hashtags when sharing an Instagram Reel to Facebook?
Yes, you can edit the caption and add hashtags when sharing an Instagram Reel to Facebook. You can make any necessary changes before posting it on Facebook.To share Instagram Reels to Facebook, follow these steps:
1. Open the Instagram app on your mobile device.
2. Create or select the Reel you want to share.
3. Tap on the three dots (…) at the bottom right corner of the Reel.
4. From the options that appear, select “Share to Facebook.”
5. If prompted, log in to your Facebook account.
6. Customize the privacy settings for the post, if desired.
7. Add a caption or any additional details to the post.
8. Tap on “Share” to publish the Reel on your Facebook timeline.
In conclusion, sharing Instagram Reels to Facebook is a simple process that can be done directly from the Instagram app. By following the steps mentioned above, you can easily share your Reels with your Facebook friends and followers.


