-
Table of Contents
- Benefits of Using the IKEA DIRIGERA Smart Hub in Your Home
- Step-by-Step Guide to Setting Up Your IKEA DIRIGERA Smart Hub
- Troubleshooting Common Issues When Setting Up the IKEA DIRIGERA Smart Hub
- Integrating Other Smart Devices with Your IKEA DIRIGERA Smart Hub
- Tips and Tricks for Maximizing the Functionality of Your IKEA DIRIGERA Smart Hub
- Q&A
“Effortlessly connect and control your smart home with IKEA DIRIGERA Smart Hub.”
Setting up your IKEA DIRIGERA Smart Hub is a straightforward process that allows you to control and automate your smart home devices. In this guide, we will walk you through the steps to get your DIRIGERA Smart Hub up and running, so you can start enjoying the convenience and efficiency of a connected home.
Benefits of Using the IKEA DIRIGERA Smart Hub in Your Home
The IKEA DIRIGERA Smart Hub is a revolutionary device that can transform your home into a smart home. With its advanced features and user-friendly interface, this smart hub offers a wide range of benefits for homeowners. In this article, we will explore the various advantages of using the IKEA DIRIGERA Smart Hub in your home.
One of the key benefits of the IKEA DIRIGERA Smart Hub is its ability to centralize control over all your smart devices. Whether you have smart lights, thermostats, or security cameras, this smart hub can connect and control them all from a single interface. This not only simplifies the management of your smart devices but also allows for seamless integration and automation.
Another advantage of the IKEA DIRIGERA Smart Hub is its compatibility with a wide range of smart devices. Unlike some other smart hubs that are limited to specific brands or protocols, this smart hub works with devices from various manufacturers. This means that you can mix and match different smart devices to create a customized smart home ecosystem that suits your needs.
The IKEA DIRIGERA Smart Hub also offers advanced automation capabilities. With its built-in automation features, you can create schedules and routines for your smart devices. For example, you can set your lights to turn on automatically when you arrive home or have your thermostat adjust the temperature based on your daily routine. This level of automation not only adds convenience to your daily life but also helps to save energy and reduce utility bills.
In addition to automation, the IKEA DIRIGERA Smart Hub also supports voice control. By integrating with popular voice assistants like Amazon Alexa or Google Assistant, you can control your smart devices using simple voice commands. This hands-free control adds an extra layer of convenience and accessibility, especially for individuals with mobility issues or disabilities.
Furthermore, the IKEA DIRIGERA Smart Hub prioritizes privacy and security. With the increasing concerns about data breaches and privacy invasion, it is crucial to choose a smart hub that takes these issues seriously. This smart hub employs robust security measures to protect your personal information and ensure that your smart devices are not vulnerable to hacking or unauthorized access.
Lastly, the IKEA DIRIGERA Smart Hub offers a user-friendly interface that is easy to navigate and understand. Even if you are not tech-savvy, you can set up and configure your smart devices with ease. The intuitive interface and step-by-step instructions make the installation process straightforward, allowing you to enjoy the benefits of a smart home without any hassle.
In conclusion, the IKEA DIRIGERA Smart Hub is a game-changer for homeowners looking to embrace the smart home revolution. With its centralized control, compatibility with various devices, advanced automation, voice control, privacy and security features, and user-friendly interface, this smart hub offers a multitude of benefits. By investing in the IKEA DIRIGERA Smart Hub, you can transform your home into a more convenient, efficient, and secure living space.
Step-by-Step Guide to Setting Up Your IKEA DIRIGERA Smart Hub
The IKEA DIRIGERA Smart Hub is a powerful device that allows you to control and automate various aspects of your home. From adjusting the lighting to managing your appliances, this smart hub offers a convenient and efficient way to make your home smarter. In this step-by-step guide, we will walk you through the process of setting up your IKEA DIRIGERA Smart Hub, ensuring that you can start enjoying its benefits in no time.
Step 1: Unboxing and Familiarizing Yourself with the Smart Hub
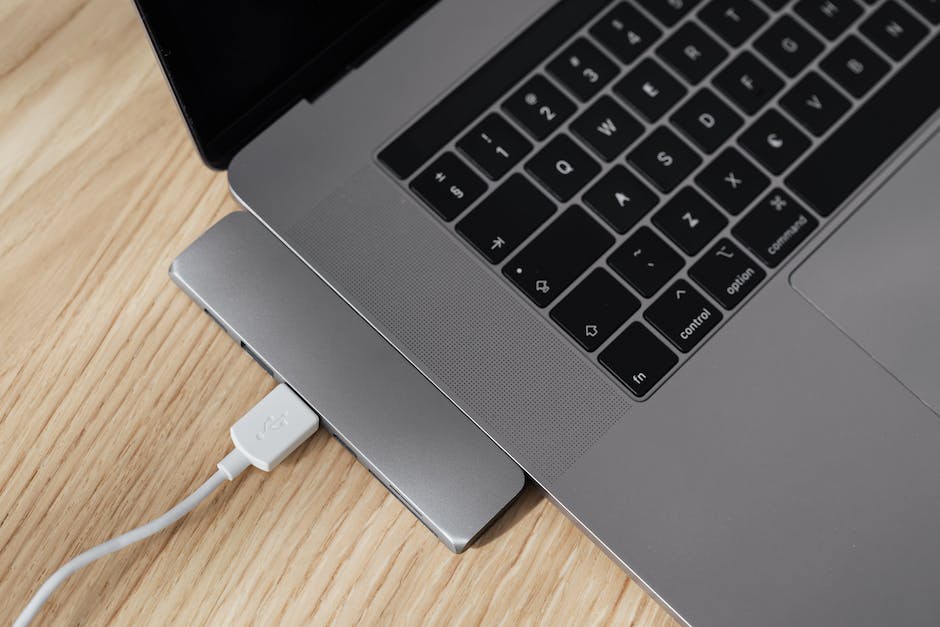
When you first receive your IKEA DIRIGERA Smart Hub, carefully unbox it and take a moment to familiarize yourself with its components. The package should include the smart hub itself, a power adapter, an Ethernet cable, and a quick start guide. Make sure all the necessary components are present and in good condition before proceeding to the next step.
Step 2: Connecting the Smart Hub to Power and Internet
To begin the setup process, connect the power adapter to the smart hub and plug it into a power outlet. Next, connect one end of the Ethernet cable to the smart hub and the other end to your router or modem. This will establish a stable internet connection for the smart hub to function properly.
Step 3: Downloading and Installing the IKEA Home Smart App
To control and manage your IKEA DIRIGERA Smart Hub, you will need to download and install the IKEA Home Smart app on your smartphone or tablet. This app is available for both iOS and Android devices and can be found in the respective app stores. Once downloaded, open the app and follow the on-screen instructions to create an account or log in if you already have one.
Step 4: Adding the Smart Hub to the App
With the app installed and your account set up, it’s time to add the smart hub to the app. Open the IKEA Home Smart app and tap on the “+” icon to add a new device. Select “Smart Hub” from the list of available devices and follow the prompts to connect the app to your smart hub. This may involve scanning a QR code or entering a unique code provided with the smart hub.
Step 5: Configuring the Smart Hub
Once the app successfully connects to the smart hub, you will be prompted to configure it. This includes selecting your preferred language, setting up a Wi-Fi connection, and updating the smart hub’s firmware if necessary. Follow the on-screen instructions to complete the configuration process, ensuring that you provide accurate and up-to-date information.
Step 6: Adding Devices and Creating Automations
With the smart hub successfully set up, you can now start adding devices and creating automations. The IKEA DIRIGERA Smart Hub is compatible with a wide range of IKEA smart devices, such as smart bulbs, smart plugs, and motion sensors. Simply follow the instructions provided with each device to connect it to the smart hub and configure its settings through the IKEA Home Smart app. Once connected, you can create automations to control your devices based on specific triggers or schedules.
In conclusion, setting up your IKEA DIRIGERA Smart Hub is a straightforward process that can be completed in a few simple steps. By following this step-by-step guide, you can ensure a smooth and hassle-free setup experience, allowing you to enjoy the convenience and efficiency of a smart home. So go ahead, unbox your smart hub, and embark on your journey towards a smarter home today.
Troubleshooting Common Issues When Setting Up the IKEA DIRIGERA Smart Hub
Setting up a smart hub can be an exciting endeavor, but it can also come with its fair share of challenges. The IKEA DIRIGERA Smart Hub is no exception. While it offers a range of features and benefits, users may encounter some common issues during the setup process. In this article, we will explore these issues and provide troubleshooting tips to help you get your IKEA DIRIGERA Smart Hub up and running smoothly.
One common issue that users may face is difficulty connecting the smart hub to their home Wi-Fi network. This can be frustrating, as a stable internet connection is crucial for the hub to function properly. To troubleshoot this issue, start by ensuring that your Wi-Fi network is working correctly. Check if other devices in your home are able to connect to the network without any problems. If they are, try restarting your router and then attempt to connect the smart hub again. If the issue persists, you may need to reset the hub and start the setup process from scratch.
Another issue that users may encounter is the inability to pair their smart hub with other devices, such as smart lights or sensors. This can prevent users from fully utilizing the hub’s capabilities. To troubleshoot this issue, make sure that the devices you are trying to pair are compatible with the IKEA DIRIGERA Smart Hub. Check the manufacturer’s specifications and ensure that the devices are within the recommended range for pairing. Additionally, ensure that the devices are in close proximity to the hub during the pairing process. If the issue persists, try resetting the hub and the devices and attempt the pairing process again.
Users may also experience issues with the responsiveness of the smart hub’s interface. This can make it difficult to control connected devices or access the hub’s features. To troubleshoot this issue, start by checking if there are any software updates available for the hub. Updating the software can often resolve performance issues. If there are no updates available, try restarting the hub and the connected devices. Additionally, ensure that the hub is not overloaded with too many connected devices, as this can impact its responsiveness. If the issue continues, you may need to contact IKEA customer support for further assistance.
Lastly, users may encounter issues with the hub’s voice control feature. This can prevent them from using voice commands to control connected devices or access hub features. To troubleshoot this issue, ensure that the hub’s microphone is not obstructed or covered. Clear any dust or debris that may be affecting the microphone’s performance. Additionally, check if the voice control feature is enabled in the hub’s settings. If it is, try restarting the hub and attempting the voice commands again. If the issue persists, you may need to contact IKEA customer support for further guidance.
In conclusion, setting up the IKEA DIRIGERA Smart Hub can come with its fair share of challenges. However, by following these troubleshooting tips, you can overcome common issues and get your smart hub up and running smoothly. Remember to check your Wi-Fi connection, ensure compatibility with other devices, address interface responsiveness, and troubleshoot voice control problems. With a little patience and perseverance, you’ll be able to enjoy the full benefits of your IKEA DIRIGERA Smart Hub.
Integrating Other Smart Devices with Your IKEA DIRIGERA Smart Hub
Integrating Other Smart Devices with Your IKEA DIRIGERA Smart Hub
Once you have successfully set up your IKEA DIRIGERA Smart Hub, you can take your smart home experience to the next level by integrating other smart devices. This will allow you to control and manage multiple devices from a single hub, making your life more convenient and efficient. In this section, we will guide you through the process of integrating various smart devices with your IKEA DIRIGERA Smart Hub.
Before you begin, it is important to ensure that the smart devices you want to integrate are compatible with the IKEA DIRIGERA Smart Hub. Most popular smart devices, such as smart lights, thermostats, and security cameras, are compatible with the hub. However, it is always a good idea to check the compatibility list provided by IKEA or consult the manufacturer’s website.
To integrate a smart device with your IKEA DIRIGERA Smart Hub, you will need to follow a few simple steps. First, make sure that the device is properly set up and connected to your home Wi-Fi network. This may involve downloading a dedicated app and following the manufacturer’s instructions.
Once the device is set up, open the IKEA Home Smart app on your smartphone or tablet. Tap on the menu icon and select “Add device” from the options. The app will then guide you through the process of adding a new device. This usually involves scanning a QR code or entering a unique code provided with the device.
After successfully adding the device, you can customize its settings and assign it to specific rooms or groups within the app. This will allow you to control multiple devices simultaneously, such as turning off all the lights in a particular room or adjusting the temperature in different zones of your home.
One of the key benefits of integrating smart devices with your IKEA DIRIGERA Smart Hub is the ability to create automation routines. Automation allows you to set up specific actions or triggers that will be executed automatically based on certain conditions. For example, you can create a routine that turns on the lights and adjusts the thermostat when you arrive home, or a routine that turns off all the devices when you leave the house.
To create an automation routine, open the IKEA Home Smart app and navigate to the automation section. Tap on “Add automation” and follow the prompts to set up the desired conditions and actions. You can choose from a wide range of options, such as time-based triggers, sensor-based triggers, or even voice commands using a compatible smart assistant.
In addition to automation, you can also control your integrated smart devices using voice commands. The IKEA DIRIGERA Smart Hub is compatible with popular voice assistants like Amazon Alexa and Google Assistant. Simply link your IKEA account with your preferred voice assistant and start controlling your devices with simple voice commands.
Integrating other smart devices with your IKEA DIRIGERA Smart Hub opens up a world of possibilities for creating a truly connected and intelligent home. From controlling lights and thermostats to managing security cameras and door locks, the possibilities are endless. With a little bit of setup and customization, you can transform your home into a smart haven that enhances your lifestyle and simplifies your daily routines.
Tips and Tricks for Maximizing the Functionality of Your IKEA DIRIGERA Smart Hub
The IKEA DIRIGERA Smart Hub is a powerful device that can greatly enhance the functionality of your smart home. With its ability to connect and control various smart devices, it offers a seamless and convenient way to manage your home automation system. In this article, we will provide you with some tips and tricks on how to set up and maximize the functionality of your IKEA DIRIGERA Smart Hub.
First and foremost, it is important to ensure that you have all the necessary components to set up your smart hub. The DIRIGERA Smart Hub comes with a power adapter, an Ethernet cable, and a quick start guide. Make sure you have these items readily available before you begin the setup process.
To start the setup process, connect the power adapter to the DIRIGERA Smart Hub and plug it into a power outlet. Next, connect one end of the Ethernet cable to the Smart Hub and the other end to your router. This will establish a stable and reliable internet connection for your smart hub.
Once the physical connections are in place, it is time to download the IKEA Home smart app on your smartphone or tablet. This app is available for both iOS and Android devices and is essential for setting up and controlling your DIRIGERA Smart Hub.
After downloading the app, open it and follow the on-screen instructions to create an IKEA Home smart account. This account will allow you to access and control your smart hub from anywhere using your smartphone or tablet.
Once you have created an account, the app will guide you through the process of adding your DIRIGERA Smart Hub to your account. This involves scanning the QR code on the back of the hub using your smartphone or tablet’s camera. The app will then automatically detect and connect to your smart hub.
Once your DIRIGERA Smart Hub is successfully connected, you can start adding and controlling your smart devices. The app provides a user-friendly interface that allows you to easily add and manage devices such as smart lights, smart plugs, and smart blinds.
To add a device, simply tap on the “+” icon in the app and follow the instructions to pair it with your smart hub. Once paired, you can control the device directly from the app or use voice commands if you have a compatible voice assistant such as Amazon Alexa or Google Assistant.
In addition to controlling individual devices, the DIRIGERA Smart Hub also allows you to create automation routines. These routines enable you to automate certain actions based on triggers such as time of day, sensor readings, or device interactions.
For example, you can create a routine that turns on your smart lights and opens your smart blinds when you wake up in the morning. This can be done by setting the trigger to your alarm going off and specifying the actions you want to be performed.
By utilizing automation routines, you can streamline and simplify your daily routines, making your smart home even more convenient and efficient.
In conclusion, setting up and maximizing the functionality of your IKEA DIRIGERA Smart Hub is a straightforward process that can greatly enhance your smart home experience. By following the steps outlined in this article, you can easily set up your smart hub and start enjoying the convenience and control it offers. So go ahead, take the plunge, and transform your home into a smart home with the IKEA DIRIGERA Smart Hub.
Q&A
1. How do I set up my IKEA DIRIGERA Smart Hub?
To set up your IKEA DIRIGERA Smart Hub, follow these steps:
– Connect the hub to a power source using the provided adapter.
– Download the IKEA Home smart app on your smartphone or tablet.
– Open the app and follow the on-screen instructions to create an account or log in.
– Once logged in, select “Add device” and choose the DIRIGERA Smart Hub from the list.
– Follow the app’s instructions to connect the hub to your Wi-Fi network.
2. What devices can be connected to the IKEA DIRIGERA Smart Hub?
The IKEA DIRIGERA Smart Hub can connect to various smart devices, including IKEA smart lighting products, blinds, speakers, and other compatible devices that use the Zigbee protocol.
3. How do I connect my IKEA smart lighting products to the DIRIGERA Smart Hub?
To connect your IKEA smart lighting products to the DIRIGERA Smart Hub, follow these steps:
– Ensure the lights are installed and powered on.
– Open the IKEA Home smart app and go to “Add device.”
– Select “Lighting” and follow the app’s instructions to search for and connect to your specific lighting products.
4. Can I control the DIRIGERA Smart Hub remotely?
Yes, you can control the DIRIGERA Smart Hub remotely using the IKEA Home smart app. As long as your smartphone or tablet has an internet connection, you can access and control your connected devices from anywhere.
5. Are there any additional features or settings for the DIRIGERA Smart Hub?
The DIRIGERA Smart Hub offers various features and settings, including the ability to create schedules, set timers, and create automation routines for your connected devices. You can also integrate the hub with voice assistants like Amazon Alexa or Google Assistant for voice control.In conclusion, setting up your IKEA DIRIGERA Smart Hub involves the following steps:
1. Start by unpacking the DIRIGERA Smart Hub and its components.
2. Connect the Smart Hub to a power source using the provided power adapter.
3. Use an Ethernet cable to connect the Smart Hub to your home router.
4. Download and install the IKEA Home smart app on your smartphone or tablet.
5. Open the app and follow the on-screen instructions to create an IKEA account or log in to an existing one.
6. Once logged in, select “Add device” and choose the DIRIGERA Smart Hub from the list of available devices.
7. Follow the app’s instructions to complete the setup process, including connecting the Smart Hub to your Wi-Fi network.
8. Once the setup is complete, you can start adding and controlling compatible IKEA smart devices through the DIRIGERA Smart Hub.
By following these steps, you can easily set up your IKEA DIRIGERA Smart Hub and enjoy the convenience of controlling your smart home devices.


