-
Table of Contents
- Troubleshooting common connectivity issues with Xbox One controllers
- Step-by-step guide to connecting an Xbox One controller to a PC
- Syncing an Xbox One controller with a mobile device: A comprehensive tutorial
- Exploring different methods to connect multiple Xbox One controllers to a console
- Tips and tricks for maintaining a stable connection between an Xbox One controller and the console
- Q&A
“Seamlessly connect and sync your Xbox One controller for uninterrupted gaming.”
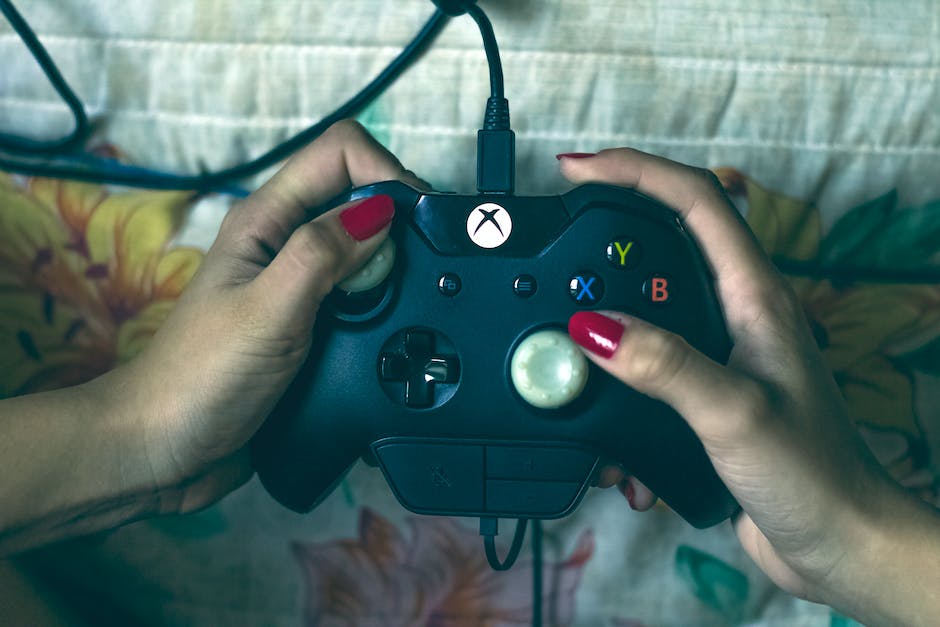
Connecting and syncing an Xbox One controller is a straightforward process that allows you to enjoy gaming on your Xbox console or PC. In this guide, we will walk you through the steps to connect and sync your Xbox One controller, ensuring a seamless gaming experience.
Troubleshooting common connectivity issues with Xbox One controllers
How to Connect and Sync an Xbox One Controller
The Xbox One controller is a crucial component of the gaming experience on the Xbox One console. It allows players to navigate through menus, control characters, and interact with the game world. However, like any electronic device, the Xbox One controller can sometimes encounter connectivity issues. In this article, we will explore some common problems that users may face when trying to connect and sync their Xbox One controllers, as well as provide troubleshooting steps to resolve these issues.
One of the most common connectivity issues with Xbox One controllers is the failure to sync with the console. This can be frustrating, as it prevents players from enjoying their favorite games. To troubleshoot this problem, the first step is to ensure that the controller is properly powered on. Press the Xbox button on the controller to turn it on, and if the light on the controller does not illuminate, replace the batteries or charge the controller using a USB cable.
If the controller is powered on but still fails to sync, the next step is to check the connection between the controller and the console. The Xbox One console supports both wired and wireless connections for the controller. For a wired connection, simply connect the controller to the console using a USB cable. If the controller syncs successfully in this mode, it indicates that the wireless connection may be the source of the problem.
To troubleshoot wireless connectivity issues, start by ensuring that the console and the controller are within range of each other. The Xbox One controller uses a wireless signal to communicate with the console, and if they are too far apart, the connection may be weak or nonexistent. Move closer to the console and try syncing the controller again.
If proximity is not the issue, interference from other wireless devices may be causing the problem. Wireless routers, smartphones, and other electronic devices can interfere with the signal between the controller and the console. To minimize interference, try turning off or moving away from these devices. Additionally, ensure that the console is not obstructed by any objects that may block the wireless signal.
Another troubleshooting step is to power cycle the console and the controller. Turn off the console and unplug it from the power source. Remove the batteries from the controller and wait for a few minutes. Then, plug the console back in, turn it on, and insert the batteries into the controller. Press the sync button on the console and the sync button on the controller simultaneously. This should initiate the syncing process and resolve any connectivity issues.
If all else fails, updating the controller’s firmware may be necessary. Microsoft periodically releases updates for the Xbox One controller to improve its performance and address connectivity issues. To update the controller’s firmware, connect it to the console using a USB cable and navigate to the settings menu. Select “Devices & accessories” and choose the controller that needs updating. Follow the on-screen instructions to complete the firmware update.
In conclusion, connectivity issues with Xbox One controllers can be frustrating, but with the right troubleshooting steps, they can be resolved. By ensuring that the controller is properly powered on, checking the connection between the controller and the console, minimizing interference, power cycling the devices, and updating the controller’s firmware, users can overcome common connectivity problems and enjoy uninterrupted gaming sessions.
Step-by-step guide to connecting an Xbox One controller to a PC
The Xbox One controller is a popular choice for gamers, known for its comfortable design and precise controls. While it is primarily designed for use with the Xbox One console, it is also possible to connect and sync an Xbox One controller to a PC. This can be particularly useful for gamers who prefer using a controller over a keyboard and mouse when playing games on their computer. In this article, we will provide a step-by-step guide on how to connect and sync an Xbox One controller to a PC.
Firstly, it is important to note that there are two types of Xbox One controllers: the original Xbox One controller and the newer Xbox One S controller. The process for connecting and syncing these controllers to a PC is slightly different, so it is essential to determine which type of controller you have before proceeding.
To connect an original Xbox One controller to a PC, you will need a USB cable. Start by plugging one end of the USB cable into the controller and the other end into an available USB port on your PC. Once the cable is connected, Windows will automatically install the necessary drivers for the controller. This may take a few moments, so be patient.
After the drivers are installed, you can check if the controller is working properly by opening the Device Manager on your PC. To do this, right-click on the Start button and select “Device Manager” from the menu. In the Device Manager window, expand the “Xbox Peripherals” category. If you see “Xbox Controller” listed, it means that the controller is successfully connected and recognized by your PC.
If you have an Xbox One S controller, the process is slightly different. Unlike the original Xbox One controller, the Xbox One S controller supports Bluetooth connectivity. To connect it to your PC, make sure that your PC has Bluetooth capabilities. Open the Bluetooth settings on your PC and put your Xbox One S controller into pairing mode by pressing and holding the Xbox button and the Connect button simultaneously for a few seconds. The Xbox button is located in the center of the controller, while the Connect button is located on the top edge of the controller, near the left shoulder button.
Once the controller is in pairing mode, it should appear in the list of available Bluetooth devices on your PC. Select the controller from the list and click “Pair” or “Connect.” Windows will then install the necessary drivers for the controller, which may take a few moments.
After the drivers are installed, you can check if the controller is working properly by opening the Device Manager, as mentioned earlier. Expand the “Xbox Peripherals” category, and if you see “Xbox Wireless Controller” listed, it means that the controller is successfully connected and recognized by your PC.
In conclusion, connecting and syncing an Xbox One controller to a PC is a straightforward process. Whether you have an original Xbox One controller or an Xbox One S controller, you can easily connect it to your PC using a USB cable or Bluetooth. By following the step-by-step guide provided in this article, you can enjoy the comfort and precision of an Xbox One controller while playing games on your PC.
Syncing an Xbox One controller with a mobile device: A comprehensive tutorial
Syncing an Xbox One controller with a mobile device: A comprehensive tutorial
In today’s digital age, gaming has become an integral part of our lives. With the advancement of technology, gaming consoles have evolved, offering a more immersive and interactive experience. One such console is the Xbox One, which has gained immense popularity among gamers worldwide. The Xbox One controller, with its ergonomic design and intuitive controls, is a crucial component of the gaming experience. However, did you know that you can also connect and sync your Xbox One controller with a mobile device? In this comprehensive tutorial, we will guide you through the process of syncing an Xbox One controller with a mobile device.
To begin, it is important to note that not all mobile devices are compatible with Xbox One controllers. Therefore, before attempting to sync your controller, ensure that your mobile device supports this feature. Most modern smartphones and tablets running on Android or iOS should be compatible, but it is always best to check the manufacturer’s website or user manual for confirmation.
Once you have confirmed compatibility, the next step is to enable Bluetooth on both your Xbox One controller and your mobile device. To enable Bluetooth on your Xbox One controller, press and hold the Xbox button located at the center of the controller until the light on the controller starts flashing. On your mobile device, navigate to the settings menu and locate the Bluetooth option. Turn on Bluetooth and wait for your device to detect the Xbox One controller.
Once your mobile device has detected the Xbox One controller, it will appear in the list of available devices. Tap on the controller’s name to initiate the pairing process. Your mobile device will then prompt you to enter a pairing code. On your Xbox One controller, press and hold the sync button located on the top of the controller, near the USB port. The sync button is a small circular button with the Xbox logo on it. Hold the sync button until the light on the controller starts flashing rapidly.
After entering the pairing code, your mobile device will establish a connection with the Xbox One controller. Once the connection is established, the light on the controller will stop flashing and remain solid. Congratulations! You have successfully synced your Xbox One controller with your mobile device.
Now that your Xbox One controller is synced with your mobile device, you can use it to play games and navigate through your device’s interface. The controller’s buttons and joysticks will function just like they would on an Xbox One console, providing you with a familiar and comfortable gaming experience.
It is worth mentioning that not all games and apps on your mobile device may be compatible with the Xbox One controller. Therefore, it is advisable to check the game or app’s compatibility before attempting to use the controller. Additionally, some games may require specific button mappings or configurations, which can be adjusted in the game’s settings menu.
In conclusion, syncing an Xbox One controller with a mobile device opens up a whole new world of gaming possibilities. With its ergonomic design and intuitive controls, the Xbox One controller enhances the gaming experience on both consoles and mobile devices. By following the steps outlined in this comprehensive tutorial, you can easily connect and sync your Xbox One controller with your mobile device, allowing you to enjoy your favorite games wherever you go. So, grab your controller, sync it with your mobile device, and let the gaming adventures begin!
Exploring different methods to connect multiple Xbox One controllers to a console
The Xbox One controller is a popular choice among gamers for its comfortable design and responsive buttons. Whether you’re playing solo or with friends, connecting and syncing multiple controllers to your console is essential for a seamless gaming experience. In this article, we will explore different methods to connect multiple Xbox One controllers to a console.
The first method is the traditional wireless connection. To connect an Xbox One controller wirelessly, you need to ensure that your console and controller are both turned on. Then, press and hold the Xbox button on the controller until it starts flashing. Next, press the connect button on the front of your console, which is located near the disc tray. The Xbox button on the controller will stop flashing and remain lit once the connection is successful. Repeat these steps for each additional controller you want to connect.
If you prefer a wired connection, you can use a micro USB cable to connect your Xbox One controller directly to the console. Simply plug one end of the cable into the controller and the other end into one of the USB ports on the front or back of the console. The controller will automatically sync with the console, and you can start playing right away. This method is especially useful if you have a limited number of USB ports or if you want to ensure a stable connection.
Another method to connect multiple Xbox One controllers is through the Xbox Wireless Adapter. This adapter allows you to connect up to eight controllers wirelessly to your PC or Xbox One console. To use the adapter, plug it into a USB port on your device and wait for the drivers to install. Once the adapter is ready, press and hold the sync button on the side of the adapter until the light starts flashing. Then, press and hold the sync button on the controller until it also starts flashing. The controller will automatically connect to the adapter, and the light on both devices will become solid once the connection is established. Repeat these steps for each additional controller you want to connect.
If you’re using an Xbox One S or Xbox One X console, you can also connect controllers using Bluetooth. To do this, make sure your console is updated to the latest software version. Then, press and hold the sync button on the front of the console until the light starts flashing. On your controller, press and hold the sync button until the Xbox button starts flashing. Open the Bluetooth settings on your console and select the controller from the list of available devices. Once the connection is established, the Xbox button on the controller will stop flashing and remain lit. You can repeat these steps to connect multiple controllers via Bluetooth.
In conclusion, connecting and syncing multiple Xbox One controllers to your console is a straightforward process. Whether you prefer a wireless or wired connection, there are various methods to choose from. By following the steps outlined in this article, you can easily connect and enjoy multiplayer gaming with your friends and family. So grab your controllers, sync them up, and get ready for an immersive gaming experience.
Tips and tricks for maintaining a stable connection between an Xbox One controller and the console
The Xbox One controller is a crucial component of the gaming experience on the console. It allows players to navigate menus, control characters, and interact with the game world. However, maintaining a stable connection between the controller and the console can sometimes be a challenge. In this article, we will explore some tips and tricks to help you connect and sync your Xbox One controller seamlessly.
Firstly, it is important to ensure that your Xbox One controller is properly charged. A low battery can cause connectivity issues and disrupt your gaming session. To charge your controller, simply connect it to the console using a USB cable or use a separate charging dock. It is recommended to charge your controller fully before starting a gaming session to avoid any interruptions.
Once your controller is charged, the next step is to connect it to the console. The Xbox One controller can be connected to the console using either a wired or wireless connection. For a wired connection, simply plug the USB cable into the controller and the console. The console will automatically recognize the controller, and you will be ready to play.
If you prefer a wireless connection, you will need to sync your controller with the console. To do this, press the Xbox button on the controller to turn it on. Then, press and hold the sync button on the console until the light on the front starts flashing. Next, press and hold the sync button on the controller until the Xbox button starts flashing. The console and controller will then sync, and you will be able to use the controller wirelessly.
In some cases, you may encounter connectivity issues even after following the above steps. If this happens, there are a few troubleshooting steps you can try. Firstly, make sure that there are no obstacles between the controller and the console that could interfere with the signal. Move any objects that may be blocking the line of sight between the two.
If the issue persists, try power cycling both the console and the controller. To power cycle the console, simply hold down the power button on the front until it turns off. Then, unplug the power cord from the back of the console and wait for a few seconds. Finally, plug the power cord back in and turn on the console. To power cycle the controller, hold down the Xbox button for about ten seconds until it turns off. Then, press the Xbox button again to turn it back on.
If none of these steps resolve the connectivity issues, it may be worth considering updating the controller’s firmware. Microsoft periodically releases updates for the Xbox One controller to improve performance and address any bugs. To update the firmware, connect the controller to the console using a USB cable and go to the settings menu. From there, navigate to the system settings and select the controller update option. Follow the on-screen instructions to update the firmware.
In conclusion, maintaining a stable connection between an Xbox One controller and the console is essential for an optimal gaming experience. By ensuring that the controller is properly charged, connecting it correctly, and troubleshooting any connectivity issues, you can enjoy uninterrupted gaming sessions. Remember to keep your controller updated with the latest firmware to take advantage of any performance improvements. With these tips and tricks, you can connect and sync your Xbox One controller effortlessly.
Q&A
1. How do I connect an Xbox One controller to my console?
To connect an Xbox One controller, press and hold the Xbox button on the controller until it starts flashing. Then, press the connect button on the console within 20 seconds.
2. Can I connect an Xbox One controller to a PC?
Yes, you can connect an Xbox One controller to a PC using a USB cable or by using Bluetooth if your PC supports it.
3. How do I sync an Xbox One controller to my console?
To sync an Xbox One controller, press and hold the connect button on the controller until the Xbox button starts flashing. Then, press the connect button on the console within 20 seconds.
4. Can I connect multiple Xbox One controllers to one console?
Yes, you can connect up to eight Xbox One controllers to a single console.
5. How do I update the firmware on my Xbox One controller?
To update the firmware on an Xbox One controller, connect it to your console using a USB cable. Then, go to the settings menu, select Devices & accessories, and choose the controller you want to update. From there, select Update firmware and follow the on-screen instructions.In conclusion, connecting and syncing an Xbox One controller is a simple process. By following the steps provided by Microsoft, users can easily connect their controller to their Xbox One console or Windows PC using either a USB cable or wireless adapter. Additionally, keeping the controller firmware up to date ensures optimal performance and compatibility.


